Tempus Pro Configuration for ZOLL emsCharts
You can import case files from the Tempus Pro device through the Corsium cloud.
Important Note: This functionality only works in the new user interface at zoll.emscharts.com.
Enable the ePCR integration
You will need to configure the Philips Corsium system to enable the ePCR integration. Once you configure the ePCR details, Corsium will send an email with the credentials that you will use in step 2 below.
Configure emsCharts to work with Tempus Pro
To set up and configure the Tempus Pro devices for your agency, log into emsCharts as a software administrator.
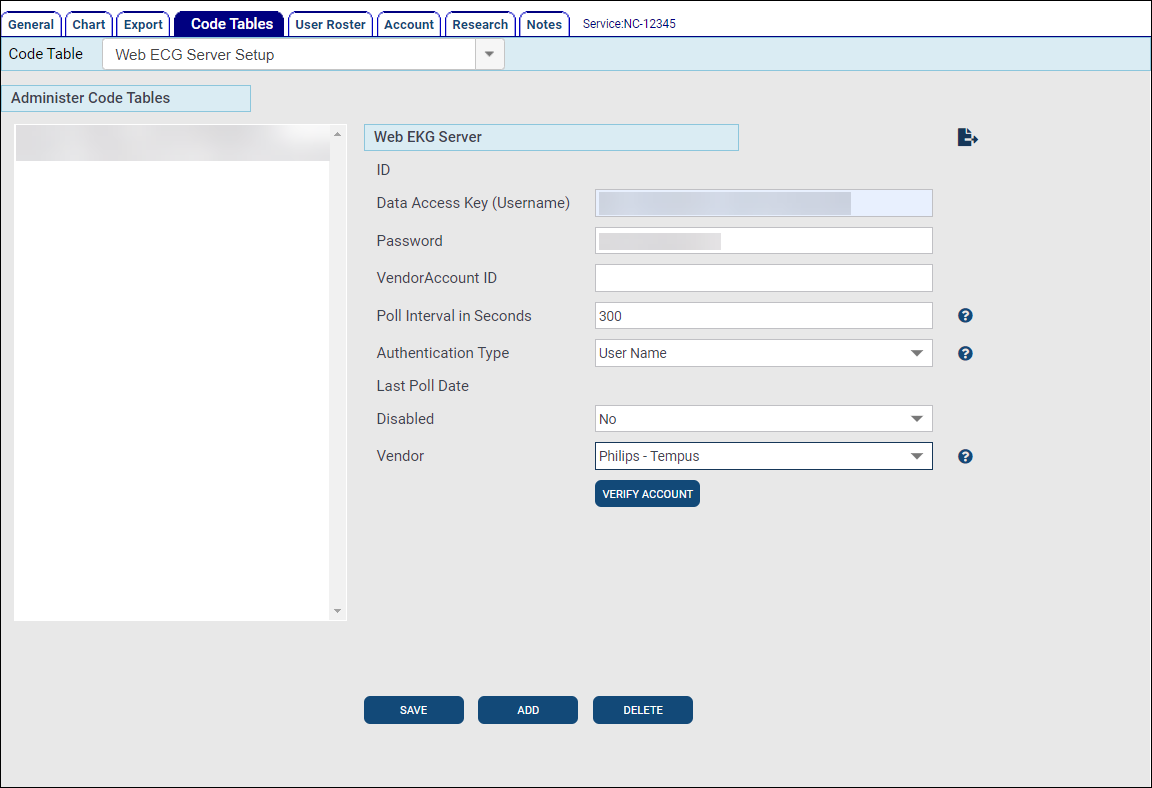
Web ECG Server Setup
-
Go to Service Configuration > Code Tables > Web ECG Server Setup.
-
Enter the Data Access Key (username) and password that was created in the Corsium cloud (see Enable the ePCR integration).
Note: If you need help generating or accessing the credentials, refer to Corsium documentation or reach out to Corsium support.
-
Leave the 'Vendor Account ID' blank.
-
Leave the 'Poll Interval in Seconds' set to 300.
-
Set the 'Authentication Type' to User Name.
-
Set 'Disabled' to No.
-
Set the 'Vendor' to Phillips - Tempus.
-
Click Verify Account to ensure that all the details are entered correctly.
-
For the last step, email the key to TempusPro@zoll.com.
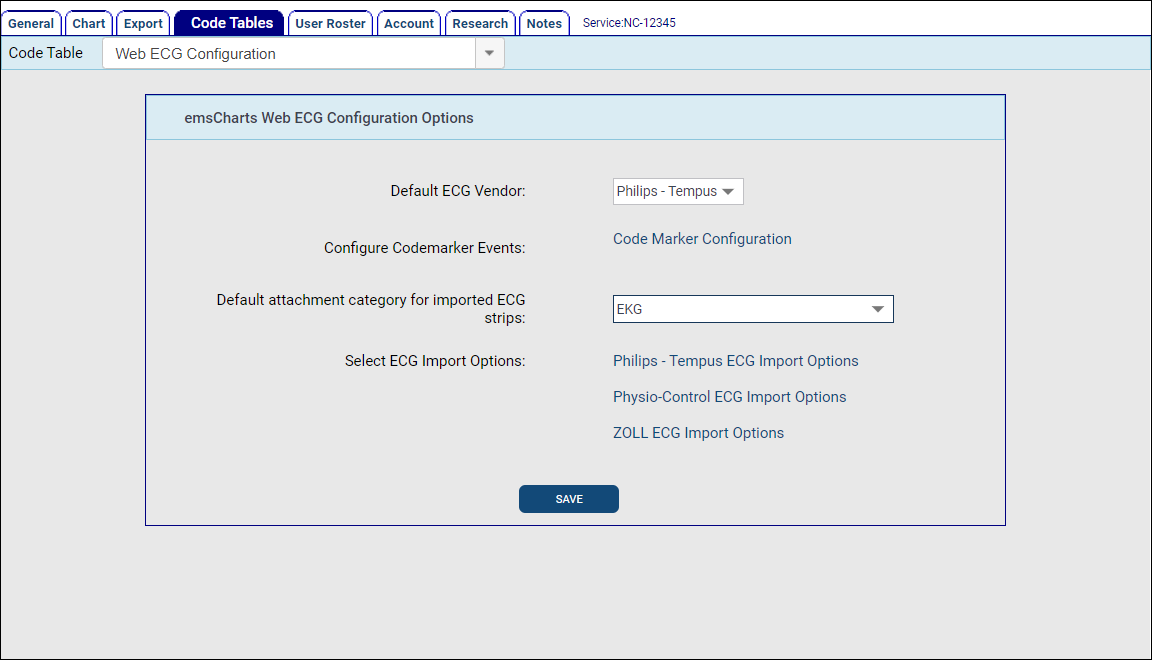
Web ECG Configuration
-
Go to Service Configuration > Code Tables > Web ECG Configuration.
-
For the 'Default ECG Vendor', select Philips - Tempus.
-
To set the import options, click Philips - Tempus EKG Import Options.

Note: Not all events are displayed in the above figure.
Configure the following:
-
Corsium Organizational ID: Enter the Corsium Organization ID (provided by Philips).
-
Vitals Interval: Set to control the frequency of received vitals.
-
Events: Set the import options for each of the events.
-
Scroll to the bottom and click Save.
-
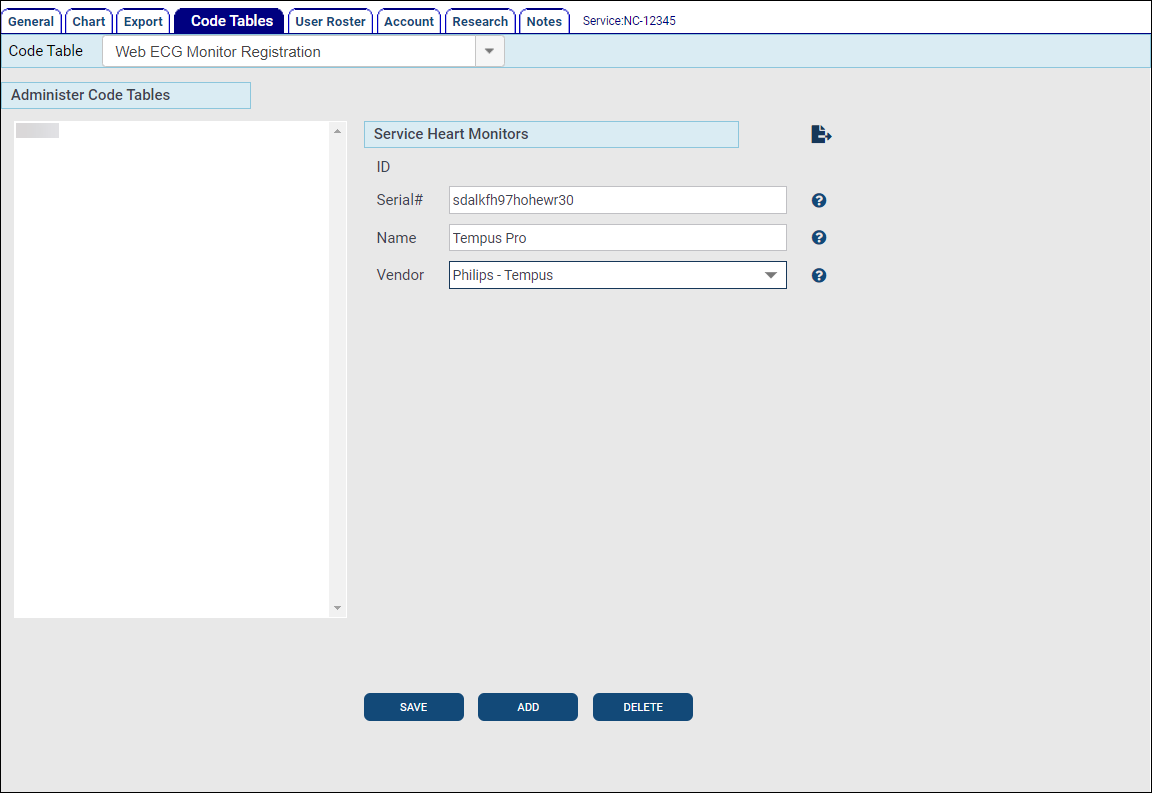
Web ECG Monitor Registration
-
Go to Service Configuration > Code Tables > Web ECG Monitor Registration.
-
Add each of your monitors to the table making sure to set the Vendor to 'Philips - Tempus'.
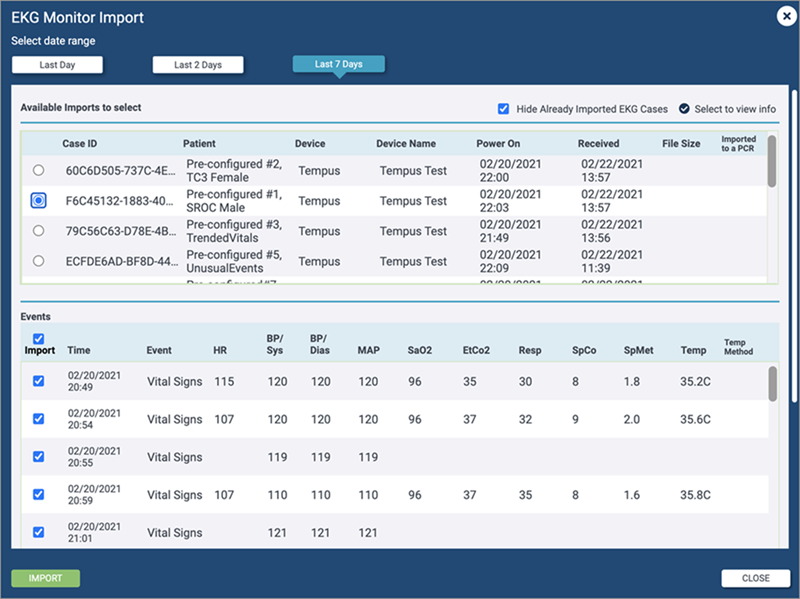
Import cases
-
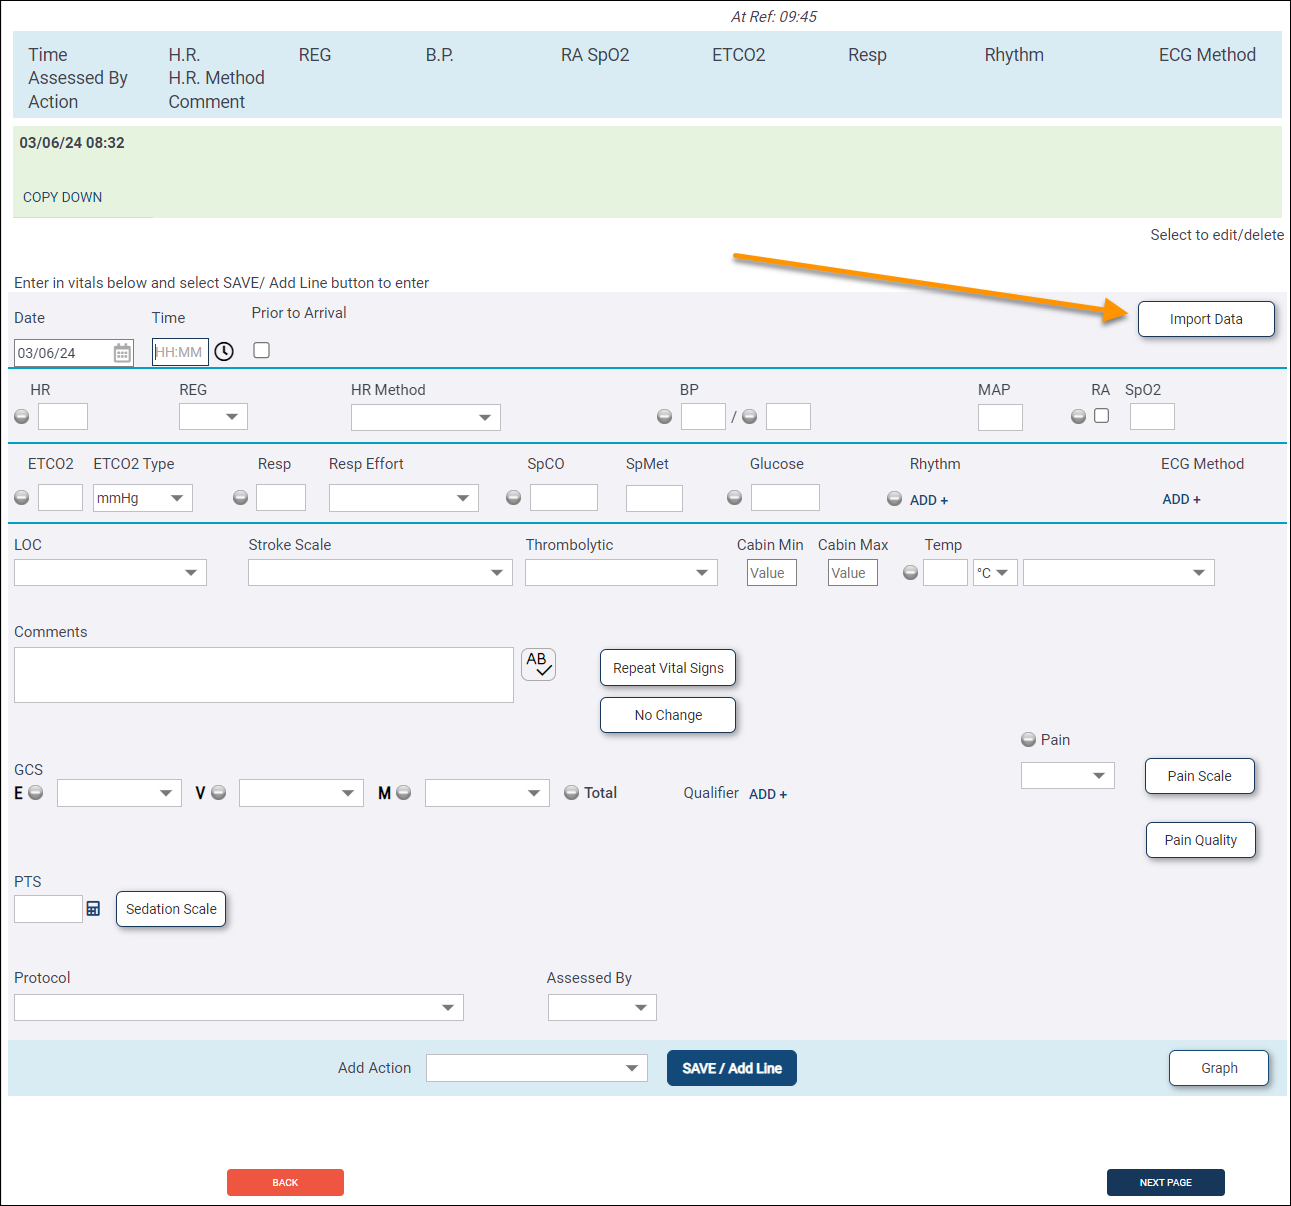
When documenting a chart, go to Page 8.
-
Click Import Data.
Note: Because the system runs a query to look for your cases when you click EKG Import, it may take some time for cases to populate on your screen.
-
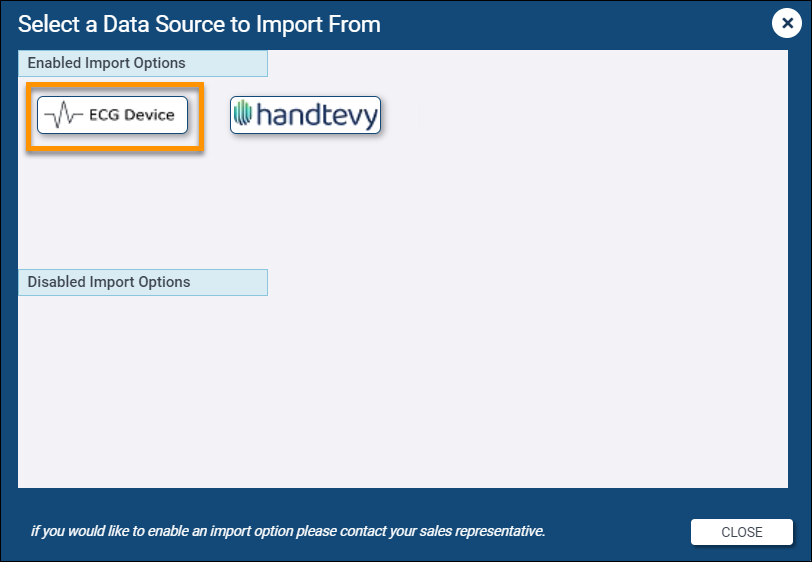
The 'Select a Data Source to Import From' window will display the data sources available to import to your Service's PCRs. Click ECG Device to proceed.
-
Select the case and then the events and reports to import.
-
Click Import.
-
The case will be attached to your chart with the selected vitals and events populated.